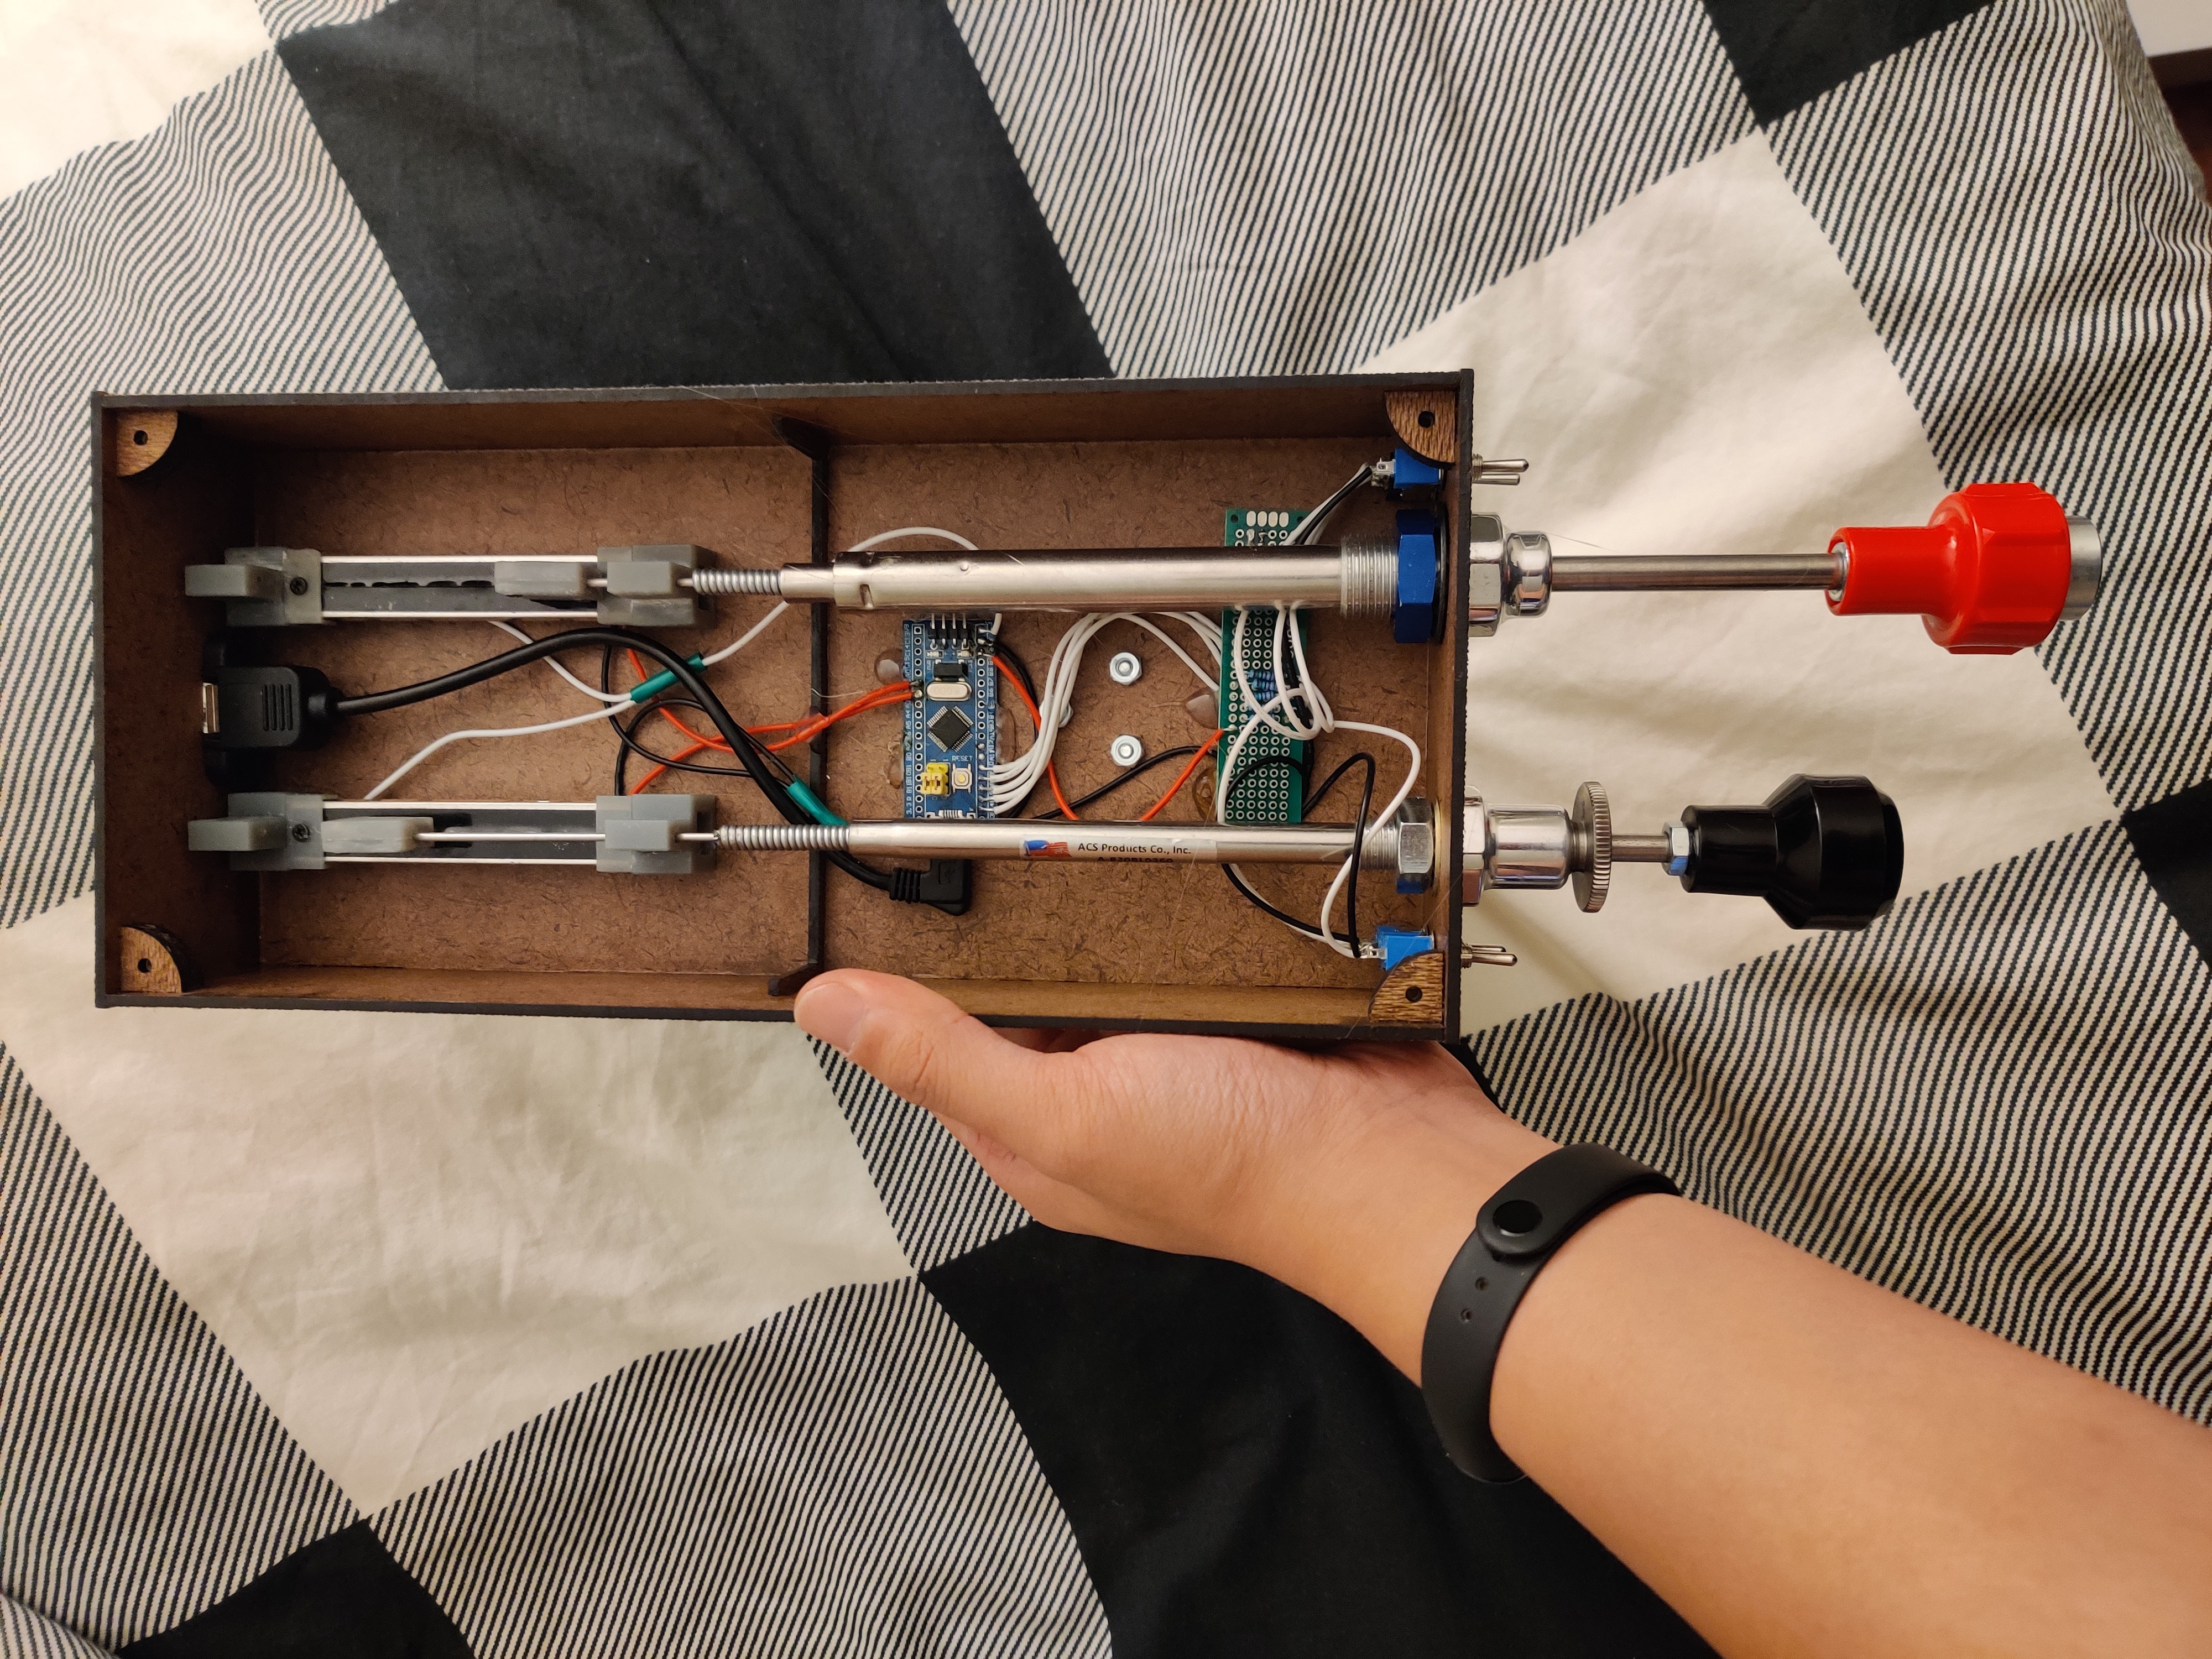
Ted's Cessna Knobox


Materials
Part I (mechanical)
a friction-locked throttle knob (I used A820)
a vernier-style mixer knob (I used A790)
hardboard, 3.5mm in thickness
M3 screws x4 for securing the potentiometers to the holders
M2 screws x4 for securing the knob ends to the potentiometer sliders
(M2.5/M3 screws + nuts) x4 for securing the holders to the enclosure
you'll need to laster-cut the hardboard and 3D-print the holders/sliders
Part II (circuitry)
stmf103c8t6 board & ST-link programmer (something like https://www.ebay.com/itm/2pcs-STM32F103C8T6-ARM-STM32-Development-Board-Module-Blue-Pill-ST-Link-V2-USA/292168190439)
slide potentiometer (10K, 88mm in length, https://www.amazon.com/gp/product/B07QVQ67MV/ref=ppx_yo_dt_b_asin_title_o06_s00?ie=UTF8&psc=1)
3 SPDT switches + 1 SPDT toggle switch
5 resistors (15K)
micro-USB to USB type-A cable (https://www.ebay.com/itm/90-Degree-Left-Angled-Micro-USB-5pin-Male-to-USB-B-Female-Panel-Mount-Type-Cable/162358249642)
(optional) mounting jig (https://www.amazon.com/gp/product/B07BHXXR4D/ref=ppx_yo_dt_b_asin_title_o01_s00?ie=UTF8&psc=1 works very well, but you'll need to drill the holes yourself)
3D Printed Components
Holders: holder.stl
Sliders: slider1.stl, slider2.stl
Enclosure
Part 1: cessna-knobox-enclosure1.svg
Part 2: cesnna-knobox-enclosure2.svg
Circuitry
Configure the potentiometers as voltage diviers:
Connect two ends to have 3.3v difference in voltage
Connect the pivot pins to A1 and A2 of the microcontroller
Configure the switches as pull-up inputs:
Connect the middle pin of all switches to the ground (G/GND)
Parallel one side of the resistors (15K x5) to be 5V (5V pin)
Connect the other side of each resistor as shown in the diagram:
One (left/right) pin from each of three switches connects to A8, A9, A10, respectively
Pins (left & right) of the fourth switch connect to B14, B15.
Note: the lower right switch is a SPDT switch that springs to off when no pressure is applied. It could be used as flap control.
Firmware
(optional) To build the firmware from source, run ./build_image.sh (make sure you have Rust/Cargo installed on your computer)
Or you can use a pre-built image already available at ./cessna-knobox.bin
Flash the image to the microcontroller using ST-link (you can either use the tool provided officially by ST, or do it in openocd)